![Simpled Logo Size-1.jpg]](https://learn.simpled.uk/hs-fs/hubfs/Simpled%20Logo%20Size-1.jpg?height=50&name=Simpled%20Logo%20Size-1.jpg)
The TTLock app is a versatile and easy-to-use tool for managing a wide range of smart locks, including door locks, parking locks, safe locks, and bicycle locks. With Bluetooth connectivity, it lets you unlock, lock, upgrade hardware, and check operation records effortlessly—all from your phone. The app also works with AI watches for added convenience, allowing you to unlock doors with wearable devices. Supporting multiple languages such as English, Chinese, Spanish, and French, the TTLock app is designed to make managing your smart locks simple and accessible, no matter where you are.
To get started, register and install the TTLock app by downloading it through the links below or by scanning the QR code. The app is available on both the Apple App Store and Google Play Store.
.

Step 1: Create and Set Up Your Account
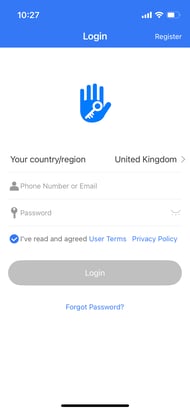
Step 1.1: Register an Account
To begin, download the TTLock app from the Apple App Store or Google Play Store. You can register an account using your phone number or email address. The app supports users from 200+ countries and regions worldwide.
- Enter your phone number or email.
- A verification code will be sent to your registered phone or email.
- Input the code to verify your account. Once verified, you can log in successfully.


Step 1.2: Set Security Questions
After logging in, you’ll be directed to a security questions page. Here, you can create customised security questions and answers for extra protection.
- These security questions help you log in on other devices or recover your account.

Step 1.3: Logging In and Password Recovery
Once your security setup is complete:
- Log in using your phone number and the password you created.
- If you forget your password, tap "Forgot Password" to recover it.

Recovery options include:
A verification code will be sent to your phone number.Answering your security questions.
When logged in, you’ll see the home screen, which displays any connected devices. If no devices are connected, you can proceed to link your smart lock.
 Previous locks added
No Previous locks were added.
Step 1.4: Apartment Assistant Module
If you’re a tenant or landlord, the app’s Apartment Assistant Module is available when the lock is equipped with apartment keys. This module includes features such as:
- Paying rent and repair costs directly through the app.
- Collecting bills for landlords via the Room Master App.
Bills may include rent, water, electricity, gas, broadband, and other utilities based on usage.

Step 2: Add and Manage Your Lock
Step 2.1: Ensure Bluetooth is Enabled and Stay Near Your Lock
Before adding your lock, ensure your phone’s Bluetooth is turned on and that you are standing close to the lock you want to set up.
- The phone that initially connects to the lock will become the administrator device.
- As the administrator, you can add features such as fingerprints, passwords, and other keys.
Important: Once a lock is added to an account, it cannot be added to a separate account unless the administrator deletes it. Deleting a lock requires the administrator to be within Bluetooth range of the lock.

Step 2.2: Managing Locks for Apartment or Hotel Users
For apartment or hotel users, the app offers advanced management features:
- Assign room numbers and manage lock details.
- Monitor who has access to specific locks.

- Supported lock types include:
- Door Locks
- Padlocks
- Bike Locks
- Safe Locks
- Lock Cylinders
- Parking Locks
- Bicycle Locks
- Remote Controls


Step 2.3: Initialising and Upgrading Your Lock
When adding a lock, ensure it is connected to the network to initialise its data.
- Lock Initialisation: The lock’s data can only be uploaded when the network is available.

- Lock Firmware Upgrade: The lock’s firmware can be updated through the app. This requires:
- Bluetooth connectivity.
- Being in close range of the lock.

After the upgrade is complete, all previously added access methods—such as passcodes, thumbprints, fobs, IC cards, and key controllers—will remain usable.
Step 2.4: Error Diagnosis and Time Calibration
The TTLock app also offers diagnostic tools to identify and fix issues with your lock.
- Error Diagnosis: Helps analyse and resolve system problems. This requires Bluetooth and proximity to the lock.
- Time Calibration: If using a WiFi Gateway, the lock can be calibrated through the gateway.
- If no gateway is available, calibration must be performed via the mobile app and Bluetooth.

Step 3: Ekey Management
Step 3.1: Gaining Control Over the Lock
Once the administrator has added the lock to their account, they gain full control over its features, including Ekey management. This allows the administrator to:
- Send Ekeys to others.
- Manage and track Ekeys using a built-in map feature.

Step 3.2: Sending Ekeys
To send an Ekey, tap the "Send Ekey" option in the app. You will have three types of Ekeys to choose from:
-
One-Time Ekey
- This Ekey can be used only once.
- Ideal for temporary access, such as a guest or delivery person.

-
Time-Limited Ekey
- This Ekey is valid for a specific period.
- Best suited for short-term access, such as rental guests or maintenance workers.

-
Permanent Ekey
- This Ekey provides ongoing access without a time limit.
- Suitable for family members or trusted individuals.

Step 3.3: One-Time Passcode Feature
When sending an Ekey from the administrator app, you can generate a One-Time Passcode.
- This passcode can be used only once to unlock the door.
- It is particularly useful when the recipient cannot access the app.

Step 3.4: Managing and Adjusting Ekeys
The administrator has full control over Ekeys and can perform the following actions:
- Delete an Ekey: Remove an Ekey to revoke access.
- Reset an Ekey: Reconfigure an Ekey for continued use.
- Send or adjust an Ekey: Change its type or duration as needed.

Step 3.5: Deadline Warnings for Ekeys
The system displays warnings for Ekeys that are nearing expiration or have expired:
- Yellow Warning: The Ekey is close to expiring.
- Red Warning: The Ekey has expired and is no longer valid.

Step 3.6: Lock and Unlock Record Query
Administrators can also search the lock records to view:
- The unlock records for each key.
- A detailed history of who accessed the lock and when.

By mastering these Ekey management features, administrators can effectively control access, monitor lock activity, and ensure security for their smart locks.
Step 4: Type of Passcodes and Passcode Management
The TT Lock App offers a variety of passcode options to meet diverse needs. Below is a detailed breakdown, divided into substeps for clarity, with space for accompanying images.
4.1 Permanent Passcode
- A permanent passcode must be used within 24 hours of being set. If not, it will be automatically deleted.
- This option is ideal for users requiring long-term access.
4.2 Time-Limited Passcode
- Purpose: The time-limited passcode allows access for a defined period.
- Validity:
- Ranges from 1 hour to 3 years.
- If within 1 year, validity can be set to the hour.
- Beyond 1 year, validity is set by month.
- Key Notes: The passcode must be used at least once within 24 hours after being set, or it will expire.

4.3 One-Time Passcode
- A one-time passcode is valid for a single use and must be used within 6 hours.
- Ideal for granting temporary access.

4.4 Clear Code
- Used to delete all passcodes stored in the lock.
- Validity: Must be used within 24 hours of being generated.
- A practical solution for resetting access credentials.

4.5 Cyclic Passcode
- Enables users to set passcodes that are valid only during a specific period, such as:
- Weekly, daily, hourly, or even annually.
- Perfect for scheduling regular access, such as cleaners or maintenance personnel.

4.6 Customised Passcode
- Users can set passcodes with customised durations and specify the time frames.
- This option provides the most flexibility for managing access.

4.7 Passcode Sharing
- Passcodes can be shared directly through popular social media platforms like Facebook, WhatsApp, Messenger, etc.
- Convenient for remote sharing with guests or service providers.

4.8 Passcode Management
The Passcode Management module allows the administrator to:
- Change passcodes.
- Delete or reset passcodes.
- Freeze and unfreeze passcodes.

Step 5: Card Management
The TT Lock App also supports IC Card Management, providing a secure and flexible way to manage card-based access to your lock. Below is a detailed guide divided into substeps, with space for accompanying images.
5.1 Adding an IC Card
- To add an IC card, ensure you are near the lock and your phone's Bluetooth is enabled.
- The process must be completed via the app near the lock.
- Validity Period Options:
- Permanent: The card will remain active indefinitely.
- Time-Limited: The card is valid for a defined duration.
- Recurring: The card is valid for a chosen amount of time that can be repeated ( Weekly, Daily, Annually)


5.2 Card View and Management
- Once IC cards are added, you can view and manage all registered cards through the IC Card Management Module. This module allows administrators to query details about each card, including validity status and assigned access.


5.3 Remote Card Issuance
- If a gateway is connected, the Remote Card Issuance function becomes available.
- This feature allows you to issue IC cards remotely.
- If no gateway is installed, the Remote Card Issuance option will be hidden.
Step 6: Fingerprint Management
The TT Lock App provides Fingerprint Management, enabling users to unlock their locks with added security and convenience. Below are the substeps for setting up and managing fingerprints, with space for images to illustrate each section.
6.1 Adding a Fingerprint
- Ensure you are near the lock with your Bluetooth enabled.
- Use the app to add a fingerprint by following the on-screen instructions.
- Once added, the fingerprint can be used to unlock the door.


6.2 Managing Fingerprints
- Similar to IC Card Management, all added fingerprints can be viewed and managed in the Fingerprint Management Module of the app.
- Administrators can query, delete, or modify fingerprint access as required.

Step 7: Unlock via Bluetooth
The TT Lock App offers flexible options for unlocking your door using Bluetooth. Here's a breakdown of how to lock and unlock the door, as well as send Bluetooth eKeys to other users. Each subsection outlines the methods for unlocking and managing access.
7.1 Locking and Unlocking via Bluetooth
Using the App Unlock Button:-
- Open the TT Lock App and click the Unlock button to open the door.
- Ensure you are within the Bluetooth range to successfully connect to the lock.
Touch-to-Activate Panel Unlock:
-
- Open the app and touch the lock panel keypad to unlock the door.
- The lock will respond to the touch if Bluetooth is enabled on your phone.

7.2 Sending Bluetooth eKeys
- Share Access with Others:
- Use the app to send Bluetooth eKeys to other users, granting them access to the lock.
- Recipients can use their eKeys via their own TT Lock App.

7.3 Unlock Remotely via Gateway
- Remote Unlock:
- If your lock is paired with a gateway, you can unlock it remotely.
- Click the small icon next to the unlock button on the app to perform a remote unlock.

By following these steps, users can easily unlock their doors using Bluetooth, touch, or remote options.
Step 8: Attendance Management
8.1 Methods of Attendance Check
Attendance can be managed through three primary methods:
- IC Cards: Employees can check in using their registered IC cards at the door.
- App: The app allows staff members to perform attendance actions directly.
- Passcodes: Time-limited or permanent passcodes can be used for attendance.

8.2 Attendance Settings
Within the Attendance Settings module, administrators can configure:
- Company Name: Add the company's name to align with attendance records.
- Working Hours: Set precise working hours for employees.
- Working Days and Holidays: Configure specific workdays and holidays.
- Lateness and Early Leave Parameters: Define the timeframes that qualify as late arrivals or early departures


8.3 Attendance Statistic
This module provides a comprehensive overview of employee attendance:
- Daily Attendance: View attendance statuses such as "Late," "Early Leave," or "No Record."

- Monthly Overview: Use the calendar feature to review attendance across months. Swipe left or right on the calendar to navigate between dates.

- Colour Codes: Different colours represent late arrivals, early departures, and unmarked attendance.
Additional Features:
-
Work Days and Leave Management:
- Customise the working days and holidays for your company.
- Specify employee leave schedules directly in the app.
-
Attendance Records:
- The app allows detailed record-keeping of attendance, enabling easier tracking and management.
-
Attendance Check Module:
- The interface supports swipe actions in the calendar to simplify attendance checks for the month.
-
Attendance Check Functions:
- Enable or disable the attendance check feature on the lock settings page.
Step 9: System Settings
The System Settings module provides an array of advanced management and configuration features:


9.1 Features in System Settings
-
Touch-Unlock Switch:
- Enable or disable the touch-unlock functionality based on user preferences.
-
Group Management:
- For large-scale management, users can create multiple key groups to organise and manage their keys efficiently.
-
Gateway Management:
- Configure and manage gateways for remote access to locks. Gateways allow enhanced features like remote unlocking, monitoring, and control.
-
Security Settings:
- Adjust security preferences to meet specific user or organisational requirements.
-
Reminder Transfer for Smart Lock:
- Set reminders or notifications related to lock usage and status changes.
9.2 Key Group Management
- Users can create key groups to organise a large number of keys for easier management and streamlined access control.


9.3 Transferring Locks
This feature allows administrators to transfer locks to another user.
- Steps to Transfer a Lock:
- Input the recipient's account information in the Room Master Lock.
- The system sends a verification code to confirm the transfer.
- Enter the verification code correctly to complete the transfer process.
- Note: Only the lock administrator has permission to transfer locks.


9.4 AI Assistant Support
- The system includes an AI Assistant that provides 24/7 support, ensuring help is always available for managing locks, troubleshooting, and optimising settings.


9.5 App Information
- Access the App Version Information page to:
- Check the current version of the app.
- View updates and system enhancements.

This module is essential for managing advanced features and ensuring smooth lock operations in larger setups. The intuitive system design allows for seamless administration of locks and related settings.
Step 10: Gateway Management
The Gateway Management module allows seamless integration between the smart lock, the WiFi network, and the app, enabling advanced remote management capabilities.
10.1 Purpose of the Gateway
The gateway acts as a bridge between the lock and the WiFi router, offering enhanced functionality, including:
- Lock/Unlock the Door Remotely: Control the lock using the app even when not in Bluetooth range.
- Read Unlock Records: View entry records for all modes of access (Password, IC Card, Fingerprint, etc.).
- Modify or Delete Passwords: This feature is available only when the WiFi Gateway is calibrated.
10.2 Setting Up the Gateway
Before adding the gateway, ensure the following:
- Your phone is connected to a WiFi network.
- Follow these steps to configure the gateway:
- Click the plus (+) icon on the app (top-right corner).
- Enter the WiFi network name and password into the app.
- Hold the button on the WiFi gateway until blue and red lights flash, indicating that the gateway is in setup mode.


10.3 Gateway Manual
Once the gateway setup is complete:
- The app will display the locks in a range that can be added to the gateway.
- Select a lock to pair with the gateway.
10.4 Remote Monitoring & Notifications
- After pairing, the lock can be monitored remotely.
- When the lock is unlocked through any mode of entry (Password, IC Card, Thumbprint, etc.), the administrator will receive a notification.
10.5 Gateway Transfer
- Similar to lock transfer, the gateway can also be transferred:
- Transfer to individual users or TT Renting users.
- Ensure the recipient account is entered correctly and verified through the app during the transfer process.
This feature is ideal for users who require remote access and monitoring of their locks, enhancing security and ease of use.